2026-05-27 start:
修改网页title:
watch(
  () => theme.value.title,
  (title) => {
    if (title) {
      document.title = title
    }
  },
  { immediate: true }
)
end
bootstrap样式库: https://getbootstrap.com/
tailwindcss样式库: https://tailwindcss.com/
官方文档:https://cn.vuejs.org/guide/introduction.html
脚手架文档:https://cli.vuejs.org/zh/index.html
官方脚手架vite文档(推荐):https://cn.vitejs.dev/guide/#scaffolding-your-first-vite-project
npm create vite@latest 然后一步步操作即可

查看node版本:
node -v
安装cli :
npm install -g @vue/cli

查看cli版本:
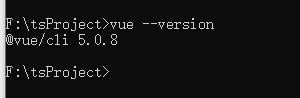
创建一个项目
vue create my-project
然后如图即可:
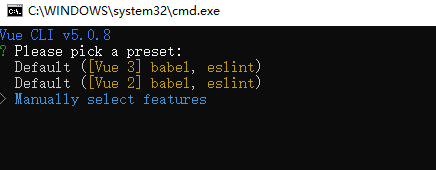
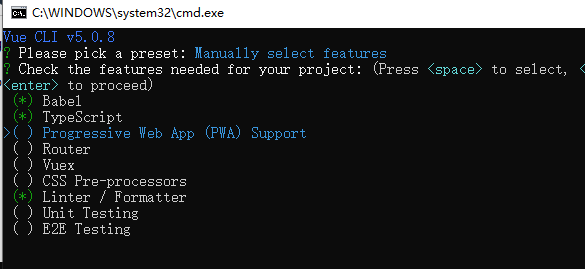

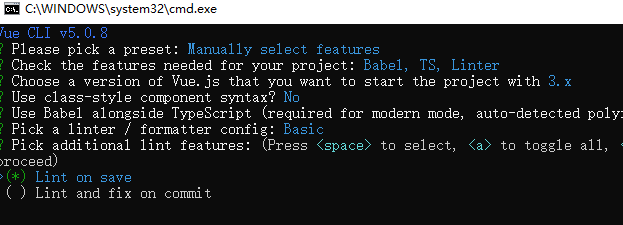
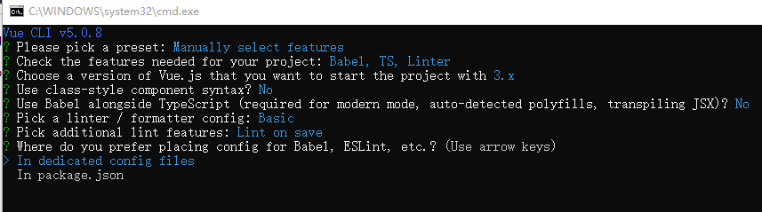
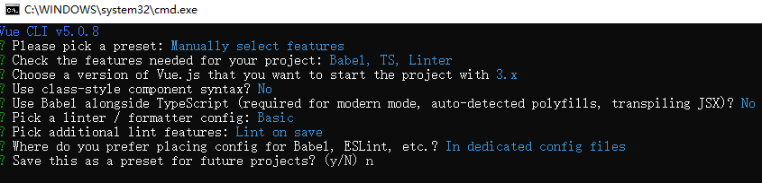
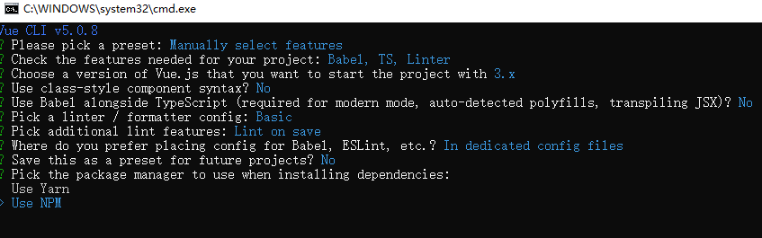
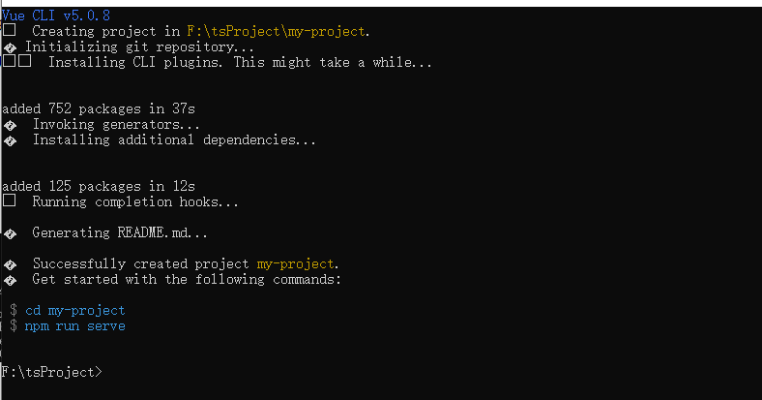
然后第一个项目就创建好了
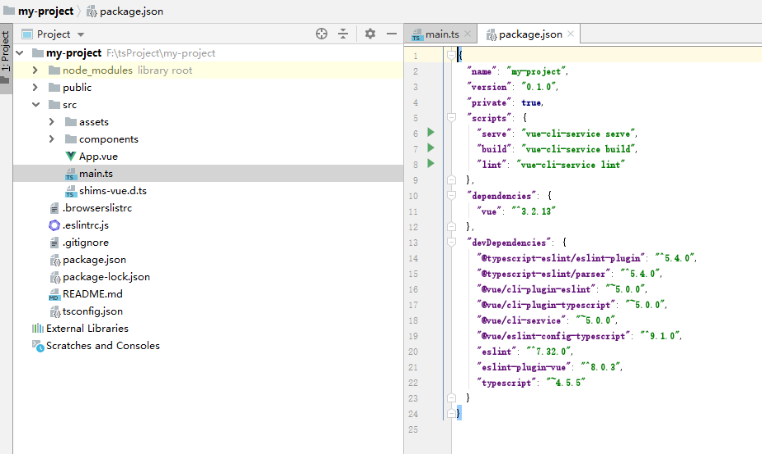
2、使用webstrom打开项目,如图:
2023-07-20 start:
vite创建一个vue项目
npm create vite@latest
npm install
npm run dev
跨域设置,在vite.config.ts中设置:
// https://vitejs.dev/config/
export default defineConfig({
  plugins: [vue()],
  server: {
    proxy: {
      '/api': {
        target: 'http://localhost:8082/', // 实际请求地址
        changeOrigin: true,
        rewrite: (path) => path.replace(/^\/api/, '')
      }
    }
  }
})
注意进行请求的时候不要输入具体完整的api,如:
http://localhost:8080/api/upload 我们只要输入:/api/upload 就可以了,不然跨域代理请求不了
TS配置:本地开发时,使用内网地址进行调试,在package.json设置:
  "scripts": {
    "dev": "vite --host 0.0.0.0",
    "build": "vue-tsc && vite build",
    "preview": "vite preview"
  },
安装axios:
npm install axios@latest
npm install vue-router@latest
end
2023-08-13 start
设置淘宝镜像:npm config set registry http://registry.npmmirror.com
查看设置:npm config list
end
2023-08-16 start
vue-router的引入:
在src目录下建立router文件夹 在router文件夹下创建router.js:
import { createRouter,createWebHistory } from "vue-router";
import HelloWorld from '../components/HelloWorld.vue';
const router = createRouter({
    history:createWebHistory(),
    routes:[
        {
            path:'/',
            component:HelloWorld,
        }
    ]
})
export default router;
修改HelloWorld.vue里的内容:
App.vue里的内容:
main.js(main.ts)中引入路由:
import { createApp } from 'vue'
import App from './App.vue'
import router from './router/router'
createApp(App).use(router).mount('#app')
页面之间的跳转:
this.$router.push('/other-page');
你可以使用 组件来创建一个链接,该组件会被渲染成一个 标签
跳转到其他页面
在某些情况下,你可能需要在跳转之前执行一些逻辑,例如验证用户的身份。为了实现这个功能,你可以使用导航守卫。
this.$router.beforeEach((to, from, next) => {
  // 在这里执行你的逻辑,例如验证用户的身份
  // 然后调用 next() 函数以继续跳转过程
  next();
});
end
2023-08-30 start:
vue3 b站视频:https://www.bilibili.com/video/BV1dS4y1y7vd?p=1&vd_source=5f6653b0e7fc3c45af50cd854bea3ee5
相关博客:https://xiaoman.blog.csdn.net/category_11618172_2.html
github地址:https://github.com/2002XiaoYu/Latest-front-end-Notes
es6 b站视频:https://www.bilibili.com/video/BV1uK411H7on?p=1&vd_source=5f6653b0e7fc3c45af50cd854bea3ee5
end
2024-06-03 start:
npm i 报错的时候,可以尝试使用:npm install --legacy-peer-deps
end
2024-06-25 start:
在utils中创建:localStorageHelper.js:
export function getItemWithExpiration(key) {
    const item = JSON.parse(localStorage.getItem(key));

    if (item && new Date().getTime() < item.expirationDate) {
        return item.value;
    }

    return null;
}

export function setItemWithExpiration(key, value, expirationMinutes) {
    const expirationDate = new Date().getTime() + expirationMinutes * 60 * 1000;
    const item = {
        value,
        expirationDate
    };
    localStorage.setItem(key, JSON.stringify(item));
}
使用:import {getItemWithExpiration,setItemWithExpiration} from "@/utils/localStorageHelper.js";
end
2025-12-30 start:
vite构建完项目后,打包配置:
package.js:
  "scripts": {
    "dev": "vite --host 0.0.0.0",
    "build": "vite build",
    "preview": "vite preview"
  },
vite.config.js:
import { defineConfig } from 'vite'
import vue from '@vitejs/plugin-vue'
import path from 'path'
// 生成唯一时间戳(精确到毫秒,确保每次打包都不同)
const buildTimestamp = new Date().getTime()

// https://vitejs.dev/config/
export default defineConfig({
  plugins: [vue()],
  base: './', // 保持相对路径,无需关心CDN地址
  resolve: {
    alias: {
      '@': path.resolve(__dirname, 'src')
    }
  },
  build: {
    assetsDir: 'assets',
    outDir: 'dist',
    assetsInlineLimit: 4096,
    // 禁用打包缓存,确保每次打包重新计算哈希/时间戳
    cache: false,
    rollupOptions: {
      output: {
        // 方案1:时间戳 + hash(推荐,双重保证唯一性)
        assetFileNames: `assets/[name].${buildTimestamp}.[hash:8].[ext]`,
        chunkFileNames: `assets/[name].${buildTimestamp}.[hash:8].js`,
        entryFileNames: `assets/[name].${buildTimestamp}.[hash:8].js`,

        // 方案2:仅时间戳(极简,绝对唯一,可选)
        // assetFileNames: `assets/[name].${buildTimestamp}.[ext]`,
        // chunkFileNames: `assets/[name].${buildTimestamp}.js`,
        // entryFileNames: `assets/[name].${buildTimestamp}.js`
      }
    },
    sourcemap: false
  },
  server: {
    allowedHosts: ['www.test.com'],
    proxy: {
      '/api': {
        target: 'http://localhost:8967',
        changeOrigin: true,
        rewrite: (path) => path.replace('/api', '/api') // 修复代理路径
      }
    }
  }
})
end