Element Plus(最主流、上手最简单)
- 官网:https://element-plus.org/
- 依赖:
element-plus@^2.5.0+、@element-plus/icons-vue(配套图标库,后台系统必备)
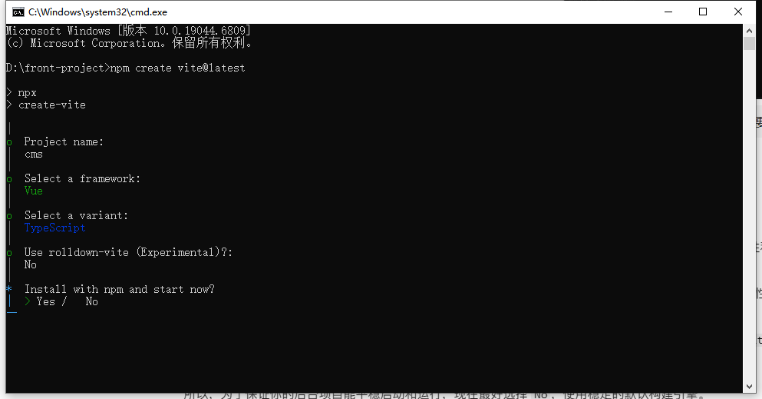
1、创建项目
npm create vite@latest
核心业务依赖(生产环境,pnpm add 直接安装 latest)
pnpm add vue@latest vue-router@latest pinia@latest axios@latest element-plus@latest辅助业务依赖(生产环境,配套工具也用 latest)
pnpm add @element-plus/icons-vue@latest pinia-plugin-persistedstate@latest

pnpm add -D sass-embedded
开发环境依赖(仅开发 / 构建使用,同样指定 latest)
pnpm add typescript@latest vue-tsc@latest @vitejs/plugin-vue@latest @types/node@latest -D清除包:
pnpm store prune
安装pnpm:
npm install -g pnpm
安装rimraf
pnpm add rimraf@latest -D
2、运行相关命令:
"scripts": {
  "dev": "vite --host 0.0.0.0",
  "build": "vue-tsc && vite build",
  "preview": "vite preview",
  "preview:port": "vite preview --port 8080",
  "type-check": "vue-tsc --noEmit",
  "clean:dist": "rimraf dist 2>nul",
  "clean:packages": "rimraf node_modules 2>nul && rimraf pnpm-lock.yaml 2>nul",
  "clean:all": "rimraf dist node_modules pnpm-lock.yaml 2>nul",
  "reinstall": "pnpm run clean:packages && pnpm install"
}
3、vite.config.ts:
import { defineConfig, ConfigEnv, UserConfig } from 'vite' // 导入vite的类型定义
import vue from '@vitejs/plugin-vue'
import path from 'path'

// 生成唯一时间戳(精确到毫秒,确保每次打包都不同)
const buildTimestamp = new Date().getTime()

// https://vitejs.dev/config/
export default defineConfig(({ command, mode }: ConfigEnv): UserConfig => {
  return {
    plugins: [vue()],
    base: './', // 保持相对路径,无需关心CDN地址
    resolve: {
      alias: {
        // 明确指定路径别名的类型,避免TS类型提示警告
        '@': path.resolve(__dirname, 'src')
      }
    },
    build: {
      assetsDir: 'assets',
      outDir: 'dist',
      assetsInlineLimit: 4096,
      // 禁用打包缓存,确保每次打包重新计算哈希/时间戳
      cache: false,
      rollupOptions: {
        output: {
          // 方案1:时间戳 + hash(推荐,双重保证唯一性)
          assetFileNames: `assets/[name].${buildTimestamp}.[hash:8].[ext]`,
          chunkFileNames: `assets/[name].${buildTimestamp}.[hash:8].js`,
          entryFileNames: `assets/[name].${buildTimestamp}.[hash:8].js`,

          // 方案2:仅时间戳(极简,绝对唯一,可选)
          // assetFileNames: `assets/[name].${buildTimestamp}.[ext]`,
          // chunkFileNames: `assets/[name].${buildTimestamp}.js`,
          // entryFileNames: `assets/[name].${buildTimestamp}.js`
        }
      },
      sourcemap: false
    },
    server: {
      allowedHosts: ['www.test.com'],
      proxy: {
        '/api': {
          target: 'http://localhost:8967',
          changeOrigin: true,
          rewrite: (path) => path.replace('/api', '/api') // 修复代理路径
        }
      }
    }
  }
})
4、tsconfig.app.json:
{
  "extends": "@vue/tsconfig/tsconfig.dom.json",
  "compilerOptions": {
    "tsBuildInfoFile": "./node_modules/.tmp/tsconfig.app.tsbuildinfo",
    "types": ["vite/client"],
    "baseUrl": ".",
    "paths": {
      "@/*": ["./src/*"]
    },

    /* Linting */
    "strict": true,
    "noUnusedLocals": true,
    "noUnusedParameters": true,
    "erasableSyntaxOnly": true,
    "noFallthroughCasesInSwitch": true,
    "noUncheckedSideEffectImports": true
  },
  "include": ["src/**/*.ts", "src/**/*.tsx", "src/**/*.vue"]
}
5、在src目录下建立router文件夹 在router文件夹下创建router.js:
import { createRouter, createWebHistory, type RouteLocationNormalized } from 'vue-router'
import { useUserStore } from '@/stores/user'

// 路由懒加载
const Login = () => import('@/views/Login.vue')
const Home = () => import('@/views/Home.vue')

// 创建 Router 实例(基础配置,后续可扩展)
const router = createRouter({
  history: createWebHistory(),
  routes: [
    {
      path: '/login',
      name: 'login',
      component: Login,
      meta: {
        title: '登录',
        requiresAuth: false // 登录页不需要认证
      }
    },
    {
      path: '/',
      name: 'home',
      component: Home,
      meta: {
        title: '首页',
        requiresAuth: true // 需要登录
      }
    },
    {
      path: '/:pathMatch(.*)*',
      redirect: '/'
    }
  ]
})

// 路由守卫
router.beforeEach((to: RouteLocationNormalized, from: RouteLocationNormalized, next) => {
  const userStore = useUserStore()
  const isLoggedIn = userStore.checkLogin()

  // 设置页面标题
  if (to.meta.title) {
    document.title = `${to.meta.title} - CMS 系统`
  }

  // 检查路由是否需要登录
  if (to.meta.requiresAuth) {
    if (!isLoggedIn) {
      // 未登录,跳转到登录页,并保存当前路径用于登录后跳转
      next({
        path: '/login',
        query: { redirect: to.fullPath }
      })
    } else {
      next()
    }
  } else {
    // 如果已登录,访问登录页时重定向到首页
    if (to.path === '/login' && isLoggedIn) {
      next('/')
    } else {
      next()
    }
  }
})

export default router
types.d.ts:
import 'vue-router'

declare module 'vue-router' {
  interface RouteMeta {
    title?: string
    requiresAuth?: boolean
  }
}
6、在src目录下创建stores/user.ts
pina:
import { defineStore } from 'pinia'
import { ref } from 'vue'

export interface UserInfo {
  username: string
  token: string
}

export const useUserStore = defineStore(
  'user',
  () => {
    // 用户信息
    const userInfo = ref<UserInfo | null>(null)
    const isLoggedIn = ref(false)

    // 登录
    const login = async (username: string, password: string) => {
      // TODO: 这里应该调用实际的登录 API
      // 模拟登录请求
      return new Promise<boolean>((resolve) => {
        setTimeout(() => {
          if (username && password) {
            userInfo.value = {
              username,
              token: `token_${Date.now()}`
            }
            isLoggedIn.value = true
            resolve(true)
          } else {
            resolve(false)
          }
        }, 500)
      })
    }

    // 登出
    const logout = () => {
      userInfo.value = null
      isLoggedIn.value = false
    }

    // 检查登录状态
    const checkLogin = () => {
      // 从持久化存储中恢复登录状态
      return isLoggedIn.value && userInfo.value !== null
    }

    return {
      userInfo,
      isLoggedIn,
      login,
      logout,
      checkLogin
    }
  },
  {
    persist: true // 启用持久化存储
  }
)
7、创建src/utils/request.ts文件
安装相关依赖:
npm install axios nprogress qs
npm install -D @types/axios @types/nprogress @types/qs typescript

pnpm add axios nprogress qs
pnpm add -D @types/axios @types/nprogress @types/qs typescript

添加md5加密依赖
pnpm add crypto-js
封装:
// 导入所需依赖
import axios from 'axios';
import type { AxiosInstance, AxiosRequestConfig, AxiosResponse, AxiosError } from 'axios';
import NProgress from 'nprogress';
import 'nprogress/nprogress.css';
import qs from 'qs';

// 移除小圆圈加载进度
NProgress.configure({ showSpinner: false });

// 定义接口:扩展AxiosRequestConfig,支持自定义是否显示进度条(可选)
interface CustomAxiosRequestConfig extends AxiosRequestConfig {
  showLoading?: boolean; // 自定义字段:是否显示NProgress进度条,默认true
}

// 内部使用的配置类型
type InternalCustomConfig = AxiosRequestConfig & {
  showLoading?: boolean;
}

// 定义接口:统一响应数据格式(根据你的后端实际返回格式调整,这里是通用模板)
interface ApiResponse<T = any> {
  code: string | number; // 后端返回的状态码(可能是字符串或数字)
  data: T; // 后端返回的业务数据
  message?: string; // 后端返回的提示信息(文档中使用 message)
  msg?: string; // 兼容旧格式的提示信息
  timestamp?: number; // 时间戳(可选)
}

// 创建axios实例
const request: AxiosInstance = axios.create({
  baseURL: '', // 请求的基础url(完整地址:http://localhost:8888/admin)
  timeout: 3000, // 超时时间
  headers: {
    'Content-Type': 'application/json;charset=utf-8' // 默认请求头
  }
});

// ===================== 请求拦截器 =====================
request.interceptors.request.use(
  (config) => {
    const customConfig = config as InternalCustomConfig;

    // 控制是否显示进度条,默认显示(如果config没有指定showLoading,就为true)
    const shouldShowLoading = customConfig.showLoading ?? true;
    if (shouldShowLoading) {
      NProgress.start();
    }

    // 只针对get请求进行参数序列化(处理数组格式参数,arrayFormat: 'repeat' 格式如:ids=1&ids=2)
    if (config.method?.toLowerCase() === 'get' && config.params) {
      config.paramsSerializer = {
        serialize: (params) => qs.stringify(params, { arrayFormat: 'repeat' })
      };
    }

    // 添加token到请求头(从localStorage获取,兼容null/undefined情况)
    const token = localStorage.getItem('token');
    if (token && config.headers) {
      config.headers.Authorization = `Bearer ${token}`;
    }

    return config;
  },
  (error: AxiosError) => {
    // 请求拦截器错误处理(如配置错误)
    NProgress.done(); // 无论如何,错误时关闭进度条
    console.error('请求拦截器错误:', error);
    return Promise.reject(error);
  }
);

// ===================== 响应拦截器 =====================
request.interceptors.response.use(
  (response: AxiosResponse<ApiResponse>) => {
    // 响应成功,关闭进度条
    NProgress.done();

    // 提取后端返回的响应数据(直接返回核心业务数据,简化上层使用)
    const res = response.data;

    // 可在这里统一处理业务状态码(根据你的后端约定调整)
    // 支持字符串和数字格式的状态码
    const code = String(res.code);
    if (code !== '200') { // 假设200是成功状态码
      const errorMsg = res.message || res.msg || '请求失败';
      console.warn('业务请求失败:', errorMsg);
      // 这里可以添加全局提示(如Element Plus的ElMessage)
      // ElMessage.error(errorMsg);
      return Promise.reject(res);
    }

    return res.data; // 最终返回:后端的业务数据(res.data)
  },
  (error: AxiosError) => {
    // 响应失败,关闭进度条
    NProgress.done();

    // 统一处理HTTP状态码错误
    const errorMsg = handleHttpError(error);
    console.error('响应拦截器错误:', errorMsg);
    // 这里可以添加全局提示(如Element Plus的ElMessage)
    // ElMessage.error(errorMsg);

    // 返回错误信息,方便上层捕获处理
    return Promise.reject({
      code: error.response?.status || 500,
      msg: errorMsg
    });
  }
);

// ===================== 辅助函数:处理HTTP状态码错误 =====================
function handleHttpError(error: AxiosError): string {
  if (error.response) {
    // 服务器返回了响应,但状态码不在2xx范围内
    const status = error.response.status;
    switch (status) {
      case 401:
        // 未授权/令牌过期,可在这里跳转到登录页
        // router.push('/login');
        return '登录状态过期,请重新登录';
      case 403:
        return '没有权限访问该资源';
      case 404:
        return '请求地址不存在';
      case 500:
        return '服务器内部错误';
      default:
        return `请求失败,HTTP状态码:${status}`;
    }
  } else if (error.request) {
    // 发送了请求,但没有收到服务器响应
    return '网络异常,请检查网络连接';
  } else {
    // 请求配置过程中发生的错误
    return `请求配置错误:${error.message}`;
  }
}

// ===================== 封装通用请求方法(可选,简化上层调用) =====================
/**
 * GET请求
 * @param url 请求地址
 * @param params 请求参数
 * @param config 额外配置(如是否显示进度条)
 * @returns Promise<T>
 */
export const get = <T = any>(
  url: string,
  params?: Record<string, any>,
  config?: CustomAxiosRequestConfig
): Promise<T> => {
  return request.get<T>(url, {
    params,
    ...config
  }) as Promise<T>;
};

/**
 * POST请求
 * @param url 请求地址
 * @param data 请求体数据
 * @param config 额外配置(如是否显示进度条)
 * @returns Promise<T>
 */
export const post = <T = any>(
  url: string,
  data?: Record<string, any>,
  config?: CustomAxiosRequestConfig
): Promise<T> => {
  return request.post<T>(url, data, config) as Promise<T>;
};

/**
 * PUT请求
 * @param url 请求地址
 * @param data 请求体数据
 * @param config 额外配置(如是否显示进度条)
 * @returns Promise<T>
 */
export const put = <T = any>(
  url: string,
  data?: Record<string, any>,
  config?: CustomAxiosRequestConfig
): Promise<T> => {
  return request.put<T>(url, data, config) as Promise<T>;
};

/**
 * DELETE请求
 * @param url 请求地址
 * @param params 请求参数
 * @param config 额外配置(如是否显示进度条)
 * @returns Promise<T>
 */
export const del = <T = any>(
  url: string,
  params?: Record<string, any>,
  config?: CustomAxiosRequestConfig
): Promise<T> => {
  return request.delete<T>(url, {
    params,
    ...config
  }) as Promise<T>;
};

// 导出axios实例(保留原始能力,方便特殊场景使用)和封装的请求方法
export default request;
export type { ApiResponse, CustomAxiosRequestConfig };
8、相关的请求api:
src/
├── types/          # 全局类型定义目录
│   ├── api.ts      # 接口请求/响应相关类型(如统一响应体、公共请求参数)
│   ├── user.ts     # 用户模块相关类型(如用户信息、用户入参)
│   ├── goods.ts    # 商品模块相关类型
│   └── index.ts    # 类型导出入口(可选,方便统一导入)
├── api/            # 接口请求封装
├── utils/          # 工具类(如你之前的 request.ts)
└── views/          # 页面组件
types/api.ts:
/**
 * 统一响应体类型(根据后端实际返回格式定义)
 */
export interface ApiResponse<T = any> {
  code: string | number // 状态码,文档中是字符串,但可能是数字
  message: string // 提示信息
  data: T // 业务数据
  timestamp?: number // 时间戳(可选)
}

/**
 * 分页请求参数
 */
export interface PageParams {
  pageNum?: number // 页码
  pageSize?: number // 每页数量
}

/**
 * 分页响应数据
 */
export interface PageResult<T = any> {
  list: T[] // 数据列表
  total: number // 总记录数
  pageNum: number // 当前页码
  pageSize: number // 每页数量
}
types/index.ts:
/**
 * 类型定义统一导出入口
 */

// API 相关类型
export * from './api'

// 用户相关类型
export * from './user'
types/user.ts:
/**
 * 用户信息类型
 */
export interface UserInfo {
  userId: number // 用户ID
  username: string // 登录账号
  nickname: string // 用户昵称
  status: number // 用户状态:1=启用,0=禁用
  token: string // JWT Token
}

/**
 * 登录请求参数
 */
export interface LoginParams {
  username: string // 登录账号
  password: string // 登录密码(MD5加密后的)
  captchaKey?: string // 验证码key(可选)
  captchaCode?: string // 验证码(可选)
}

/**
 * 验证码响应数据
 */
export interface CaptchaData {
  captchaKey: string // 验证码key,登录时需要传递此值
  imageBase64: string // Base64编码的验证码图片
}
utils/crypto.ts:
import CryptoJS from 'crypto-js'

/**
 * MD5 加密
 * @param text 待加密的文本
 * @returns MD5 加密后的字符串(小写)
 */
export function md5(text: string): string {
  return CryptoJS.MD5(text).toString()
}