2025-07-31 start:
virtualenv 命令未找到?
python -m venv .venv  # 创建虚拟环境
source .venv/bin/activate  # 激活(Linux/macOS)
.venv\Scripts\activate  # 激活(Windows)
-
确保已安装
virtualenv:pip install virtualenv -
或直接使用 Python 内置的
venv:python -m venv .venv
end
搭建虚拟环境,输入:virtualenv .venv (进入到你要创建的工程目录下)
进入虚拟环境目录中 cd .venv 进入scripts目录中 cd scripts
激活虚拟环境:activate
安装:pip install selenium -i https://pypi.tuna.tsinghua.edu.cn/simple
pip install opencv-python numpy -i https://pypi.tuna.tsinghua.edu.cn/simple
创建driver文件夹,将ChromeDriver.exe放到这个文件夹中
ChromeDriver的下载地址:https://googlechromelabs.github.io/chrome-for-testing/#stable
注意和浏览器的版本要一致不然会报很多奇怪的错误
自动点击视频播放时的弹窗:
<div role="dialog" aria-label="dialog" aria-modal="true" class="el-message-box"><div class="el-message-box__header">
<div class="el-message-box__title"><!--v-if--><span></span></div><!--v-if--></div><div class="el-message-box__content">
<div class="el-message-box__container">
<!--v-if--><div class="el-message-box__message"><p>已经学习了11分钟</p></div></div>
<div class="el-message-box__input" style="display: none;"><div class="el-input"><!-- input --><!-- prepend slot --><!--v-if--><div class="el-input__wrapper"><!-- prefix slot --><!--v-if--><input class="el-input__inner" type="text" autocomplete="off" placeholder="">
<!-- suffix slot --><!--v-if--></div><!-- append slot --><!--v-if--></div><div class="el-message-box__errormsg" style="visibility: hidden;">
</div></div></div><div class="el-message-box__btns"><!--v-if--><button class="el-button el-button--primary" type="button">
<!--v-if--><span class="">确定</span></button></div></div>
在项目中创建脚本Main.py:
import time
from selenium import webdriver
from selenium.webdriver.chrome.service import Service
from selenium.webdriver.common.by import By
from selenium.webdriver.support.wait import WebDriverWait
from selenium.webdriver.support import expected_conditions as EC
service = Service(r"./dirver/chromedriver.exe")
driver = webdriver.Chrome(service=service)
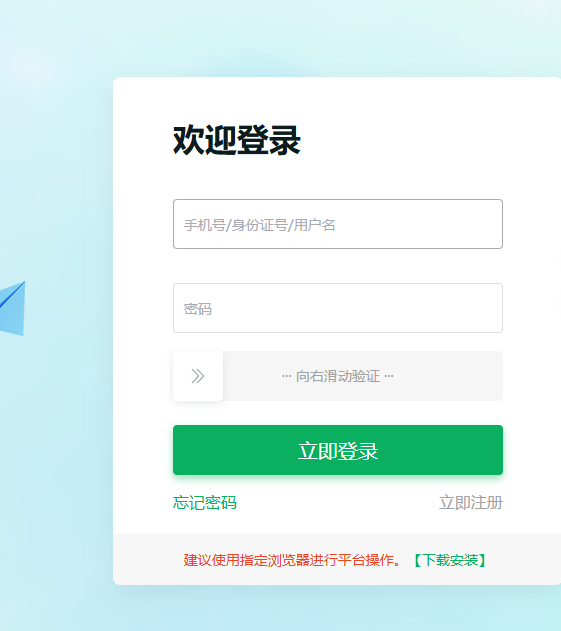
driver.get("【登录地址】/index.html#/login")
# 等待页面加载
time.sleep(5) # 简单等待,实际应用中建议使用显式等待
# 定位并填写用户名
username_field = driver.find_element(By.CSS_SELECTOR, "input[placeholder='手机号/身份证号/用户名']") # 根据实际页面修改选择器
username_field.send_keys("test")
# 定位并填写密码
password_field = driver.find_element(By.CSS_SELECTOR, "input[type='password']") # 根据实际页面修改选择器
password_field.send_keys("123456")
# 点击登录按钮
# login_button = driver.find_element(By.XPATH, "//button[@type='submit']")
# login_button.click()
time.sleep(50) # 简单等待,实际应用中建议使用显式等待
# 切换到新窗口
WebDriverWait(driver, 10).until(lambda d: len(d.window_handles) > 1)
driver.switch_to.window(driver.window_handles[-1])
# 持续监控弹窗
while True:
try:
# 等待确定按钮出现 (Element UI的确定按钮选择器)
wait = WebDriverWait(driver, 5)
confirm_button = wait.until(
EC.element_to_be_clickable((By.CSS_SELECTOR, ".el-button.el-button--primary"))
)
# 点击确定按钮
print("检测到确定按钮,正在点击...\n")
confirm_button.click()
print("确定按钮点击成功!\n")
# 等待一下再继续检测
time.sleep(2)
except Exception as e:
print("没有检测到弹窗按钮")
# 没有检测到按钮,继续监控
time.sleep(1)
continue
driver.close()运行这个脚本后,会自动打开浏览器
实现滑块的自动滑动
Action.py:
from selenium.webdriver.support import expected_conditions as EC

from selenium import webdriver
from selenium.webdriver.chrome.service import Service
from selenium.webdriver.common.action_chains import ActionChains
import time

# 初始化 WebDriver,这里以 Chrome 为例
from selenium.webdriver.common.by import By
from selenium.webdriver.support.wait import WebDriverWait

service = Service(r"./dirver/chromedriver.exe")
driver = webdriver.Chrome(service=service)

# 打开目标网站
driver.get('http://cas.study.teacheredu.cn/auth/selfHost/publicLogin/index.html#/login')

# 等待页面加载完成,可以根据实际情况调整等待时间
time.sleep(5)

print("滑动")

# 定位滑块元素和滑轨元素
slider = driver.find_element(By.XPATH, '//*[@id="app"]/div/div[2]/div[2]/div[4]')
track = driver.find_element(By.XPATH, '//*[@id="app"]/div/div[2]/div[2]/div[3]')

# 使用 ActionChains 模拟鼠标拖动操作
action = ActionChains(driver)
action.click_and_hold(slider).perform()  # 点击并按住滑块

# 计算滑动距离,这里假设滑动距离为 track_width - slider_width
track_width = track.size['width']
slider_width = slider.size['width']
distance_max = track_width - slider_width

distance = int(distance_max * 0.8)

distance_limit = int(distance_max * 0.9)

distance_limit_min = int(distance_max * 0.7)

# 增量步长:每次失败后增加的滑动距离
distance_increment = 10
attempt = 0
success = False

isAdd = True

while not success:
    action = ActionChains(driver)
    action.click_and_hold(slider).perform()  # 点击并按住滑块

    action.move_by_offset(distance, 0).perform()

    # 分段拖动,模拟人类行为
    # for i in range(0, distance, 6):
    #     action.move_by_offset(5, 0).perform()
        # time.sleep(0.05)

    action.release().perform()  # 释放滑块

    # 检查是否成功
    try:
        success_element = WebDriverWait(driver, 2).until(
            EC.visibility_of_element_located((By.CSS_SELECTOR, ".handler_ok_bg.handler.handler_bg"))
        )
        print("滑动验证成功!")
        success = True
        break
    except:
        print(f"滑动失败,第 {attempt + 1} 次尝试,增加滑动距离...")
        time.sleep(1)
        if distance > distance_limit:
            isAdd = False
        if distance < distance_limit_min:
            isAdd = True

        if isAdd:
            distance += distance_increment  # 增加滑动距离
        else:
            distance -= distance_increment  # 增加滑动距离

        attempt += 1

        # 可选:刷新验证码(如果有刷新按钮)
        # refresh_button = driver.find_element(By.CSS_SELECTOR, "#refresh_captcha")//*[@id="app"]/div/div[2]/div[3]
        # refresh_button.click()
        # time.sleep(1)

# 定位并填写用户名
username_field = driver.find_element(By.CSS_SELECTOR, "input[placeholder='手机号/身份证号/用户名']")  # 根据实际页面修改选择器
username_field.send_keys("test")

# 定位并填写密码
password_field = driver.find_element(By.CSS_SELECTOR, "input[type='password']")  # 根据实际页面修改选择器
password_field.send_keys("123456")

# 点击登录按钮
login_button = driver.find_element(By.XPATH, '//*[@id="app"]/div/div[2]/div[3]')
login_button.click()

# 验证是否成功,根据实际情况检查登录按钮是否可用等
# ...

time.sleep(20)

# 关闭浏览器
driver.quit()