1、官方文档:https://shardingsphere.apache.org/document/current/cn/user-manual/shardingsphere-jdbc/yaml-config/rules/sharding/
2、链接上一篇文章:ShardingSphere学习之水平分库
3、创建一个数据库user_db
CREATE TABLE `t_user` (
  `user_id` bigint(20) NOT NULL,
  `username` varchar(255) DEFAULT NULL,
  `ustatus` varchar(255) DEFAULT NULL,
  PRIMARY KEY (`user_id`)
) ENGINE=InnoDB DEFAULT CHARSET=utf8;
4、完整的项目截图:
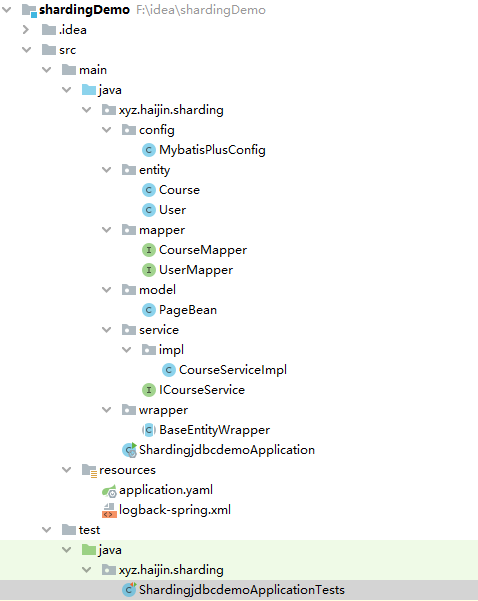
添加一个实体类User和一个数据库操作类UserMapper
5、User类:
package xyz.haijin.sharding.entity;

import com.baomidou.mybatisplus.annotation.TableId;
import com.baomidou.mybatisplus.annotation.TableName;
import lombok.Data;

/**
 * @author: haijin
 * @Date: 2023/01/01 10:21
 */
@Data
@TableName(value = "t_user")  //指定对应表
public class User {
    @TableId
    private Long userId;
    private String username;
    private String ustatus;
}
6、UserMapper类:
package xyz.haijin.sharding.mapper;

import com.baomidou.mybatisplus.core.mapper.BaseMapper;
import org.springframework.stereotype.Repository;
import xyz.haijin.sharding.entity.User;

@Repository
public interface UserMapper extends BaseMapper<User> {
}
7、配置文件:
spring:
  main:
    allow-bean-definition-overriding: true
  shardingsphere:
    datasource:
      # 配置数据源,给数据源起名称,多个数据源时使用逗号分隔
      names: m1,m2,m0
      m1:
        type: com.alibaba.druid.pool.DruidDataSource
        driver-class-name: com.mysql.cj.jdbc.Driver
        url: jdbc:mysql://192.168.152.141:3306/course_db?useUnicode=true&characterEncoding=utf8
        username: root
        password: 123456
      m2:
        type: com.alibaba.druid.pool.DruidDataSource
        driver-class-name: com.mysql.cj.jdbc.Driver
        url: jdbc:mysql://192.168.152.142:3306/course_db?useUnicode=true&characterEncoding=utf8
        username: root
        password: 123456
      m0:
        type: com.alibaba.druid.pool.DruidDataSource
        driver-class-name: com.mysql.cj.jdbc.Driver
        url: jdbc:mysql://192.168.152.141:3306/user_db?useUnicode=true&characterEncoding=utf8
        username: root
        password: 123456
      #默认数据源,未分片的表默认执行库
      sharding:
        default-data-source-name: m1
    rules:
      sharding:
        # 分片算法配置
        shardingAlgorithms:
          # 这里对应shardingAlgorithmName: table-inline
          table-inline:
            type: INLINE
            props:
              sharding-count: 10
              # cid为奇数时将数据存到course_2这张表中,当cid为偶数时,将数据存到course_1这种表中
              algorithm-expression: course_$->{cid % 2 + 1}
          # 这里对应shardingAlgorithmName: table-inline
          db-inline:
            type: INLINE
            props:
              sharding-count: 10
              # user_id为奇数时将数据存到m2这张表中,当user_id为偶数时,将数据存到m1这种表中
              algorithm-expression: m$->{user_id % 2 + 1}
          # 这里对应shardingAlgorithmName: table-inline
          user-inline:
            type: INLINE
            props:
              algorithm-expression: t_user
        # 分布式序列算法配置
        keyGenerators:
          # 这里对应keyGeneratorName: snowflake
          snowflake:
            type: SNOWFLAKE
        # 分片审计算法配置
        auditors:
          # 这里对应 auditorNames:
          #                - sharding_key_required_auditor
          sharding_key_required_auditor:
            type: DML_SHARDING_CONDITIONS
        tables:
          # 表名
          course:
            # 库配置
            databaseStrategy:
              standard:
                shardingColumn: user_id
                shardingAlgorithmName: db-inline
            # 数据表配置
            actualDataNodes: m$->{1..2}.course_$->{1..2}
            tableStrategy:
              standard:
                shardingColumn: cid
                shardingAlgorithmName: table-inline
            keyGenerateStrategy:
              column: order_id
              keyGeneratorName: snowflake
          t_user:
            # 数据表配置
            actualDataNodes: m$->{0}.t_user
            tableStrategy:
              standard:
                shardingColumn: user_id
                shardingAlgorithmName: user-inline
            keyGenerateStrategy:
              column: user_id
              keyGeneratorName: snowflake
    # 打开sql输出日志
    props:
      sql-show: true
logging:
  config: classpath:logback-spring.xml
  level:
    org:
      springframework:
        boot:
          autoconfigure:
            logging: INFO

server:
  port: 8082

mybatis-plus:
  mapper-locations: classpath:xml/*.xml
#  configuration:
#    log-impl: org.apache.ibatis.logging.stdout.StdOutImpl
因为还有上次的一些配置,所以我们重点关注m0的配置即可。
测试:
添加一条数据
    @Test
    public void addUserDb() {
        User user = new User();
        user.setUsername("test");
        user.setUstatus("normal");
        userMapper.insert(user);
    }
在查看数据库就会发现在专库中就能够看到数据了。